
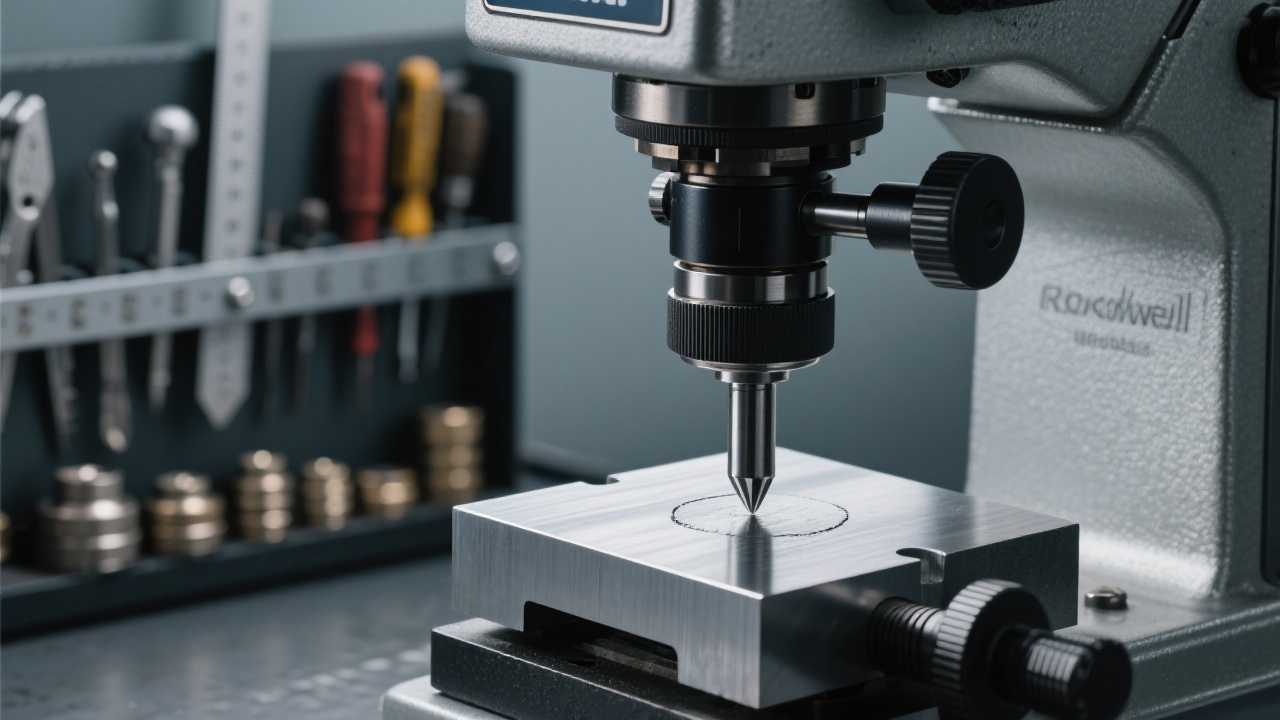
When using a fully automatic Brinell hardness tester, such as the 12MHBS - 3000ZD, it's essential to master the basic operation process. First, you need to select the appropriate test force. Different materials require different test forces to ensure accurate hardness testing. For example, softer materials may need a lower test force, while harder ones demand a higher one. Usually, the test force range can be from 187.5kgf to 3000kgf.
Next is the scale switching. The hardness tester offers multiple scales, like HBW and HBS. You should choose the right scale according to the test requirements and material properties. After that, the key step is indentation collection. The digital imaging system of the fully automatic Brinell hardness tester can accurately capture the indentation image, which is crucial for subsequent hardness calculation.
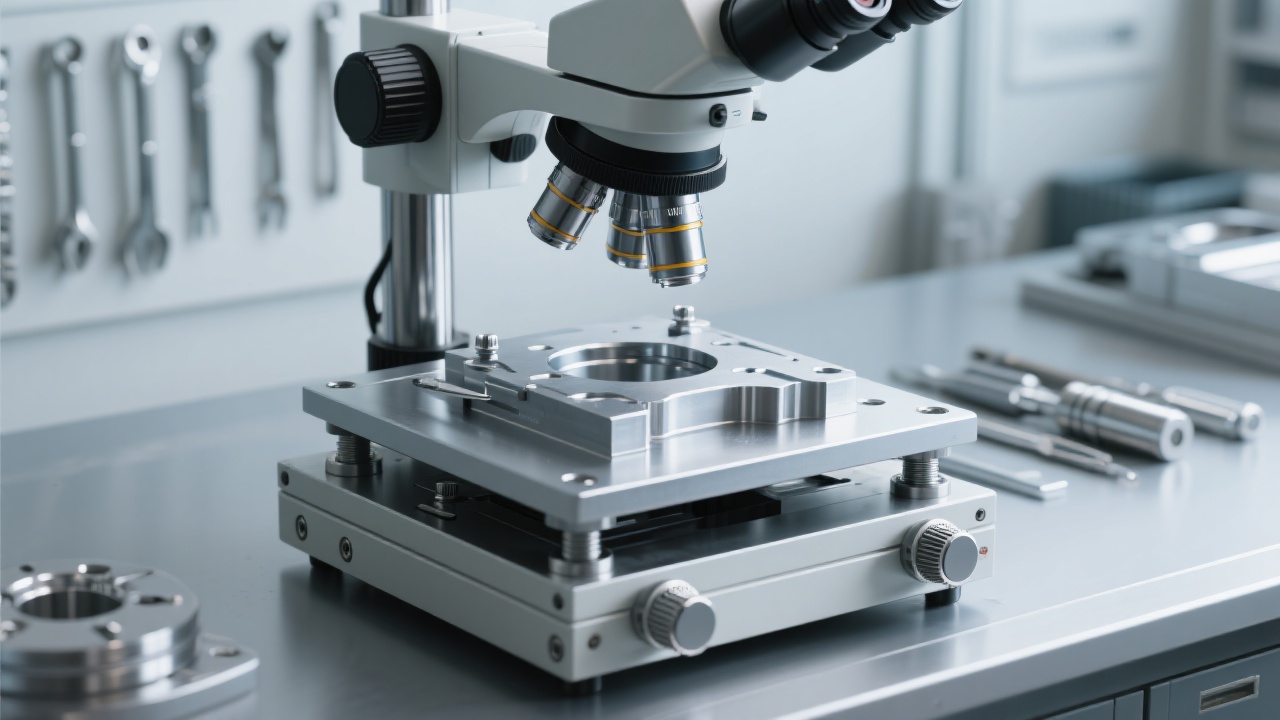
Daily maintenance is the foundation for the stable operation of the hardness tester. You need to clean the optical system, including the objective lens and eyepiece, to prevent dust and debris from affecting the image quality. Also, check the cleanliness of the workbench and wipe it clean. In addition, perform a simple inspection of the software interface to ensure there are no error messages.
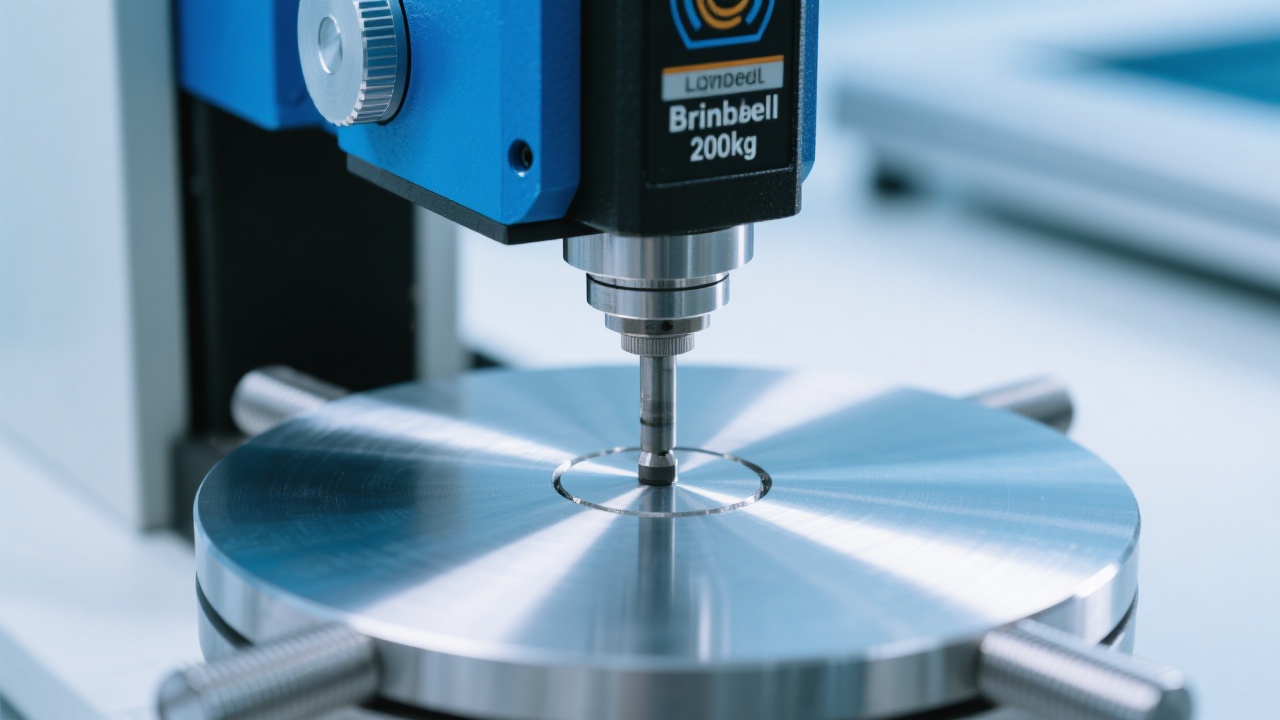
On a weekly basis, you should focus on the calibration of the indenter. A well - calibrated indenter is the key to accurate hardness testing. You can use standard hardness blocks to check and adjust the indenter. Moreover, update the software regularly. Software updates often include bug fixes and performance improvements, which can enhance the overall stability and functionality of the hardness tester.
Monthly maintenance is more comprehensive. You need to check the mechanical parts of the hardness tester, such as the transmission mechanism and the lifting device, to ensure their smooth operation. Also, conduct a thorough inspection of the electrical system to prevent potential safety hazards. For example, check the wiring connections and the power supply.
During the use of the fully automatic Brinell hardness tester, some typical fault phenomena may occur. One common problem is image blurring. This may be caused by a dirty optical lens, improper focus adjustment, or a malfunction of the digital imaging system. You can first clean the optical lens and then adjust the focus. If the problem still exists, it may be necessary to contact the manufacturer's technical support.
Another common fault is the failure of automatic switching. This could be due to a software glitch, a mechanical blockage in the turret, or a problem with the control circuit. You can try restarting the software and the machine. If the issue persists, a detailed mechanical inspection may be required.
In a well - known university laboratory, the researchers used a fully automatic Brinell hardness tester from Jincheng. Due to the strict maintenance according to the specifications, the equipment has been running stably for more than 5 years, and the test data has high consistency. In a high - end manufacturing enterprise, they also adopted a scientific maintenance plan, which not only extended the service life of the hardness tester but also improved the production efficiency by 20%.
To enhance the practicality of this guide, we recommend using visual aids such as maintenance checklists and fault - troubleshooting flowcharts. These can help you quickly locate problems and perform maintenance operations.
Q: How often should I calibrate the indenter? A: We recommend calibrating the indenter weekly to ensure accurate test results.
Q: What should I do if the software crashes? A: First, try restarting the machine and the software. If the problem persists, contact the manufacturer's technical support team.
Learn more about Jincheng's fully automatic Brinell hardness testers
 Vickers hardness tester for small-sized material detection
high-precision hardness testing equipment
closed-loop loading system
digital microscope hardness tester
brittle material hardness testing
Vickers hardness testing
Rockwell hardness testing
hardness testing methods
manufacturing hardness measurement
industrial hardness testing equipment
fully automatic Brinell hardness tester operation
Brinell hardness test calibration
digital image processing hardness testing
automatic turret hardness tester
industrial hardness measurement techniques
magnetic base hardness tester advantages
mobile hardness testing stability
on-site hardness test errors
reduction of user errors in hardness testing
shipyard hardness testing tools
Vickers hardness testing
Rockwell hardness testing
hardness testing method comparison
GB/T230.2 standard
industrial hardness tester selection
Vickers hardness tester for small-sized material detection
high-precision hardness testing equipment
closed-loop loading system
digital microscope hardness tester
brittle material hardness testing
Vickers hardness testing
Rockwell hardness testing
hardness testing methods
manufacturing hardness measurement
industrial hardness testing equipment
fully automatic Brinell hardness tester operation
Brinell hardness test calibration
digital image processing hardness testing
automatic turret hardness tester
industrial hardness measurement techniques
magnetic base hardness tester advantages
mobile hardness testing stability
on-site hardness test errors
reduction of user errors in hardness testing
shipyard hardness testing tools
Vickers hardness testing
Rockwell hardness testing
hardness testing method comparison
GB/T230.2 standard
industrial hardness tester selection


Hardness-TesterHV-5103050A-1.jpg?x-oss-process=image/resize,h_800,m_lfit/format,webp)
Hardness-Tester7MHXZD-1000A-1.jpg?x-oss-process=image/resize,h_800,m_lfit/format,webp)

Hardness-TesterHVS-5103050A-7.jpg?x-oss-process=image/resize,h_800,m_lfit/format,webp)


